Creating a CSR and installing your SSL certificate on your Windows and Linux Servers.
Use the instructions on this page to create your certificate signing request (CSR) and then to install your SSL certificate on your Windows & Linux Servers
Phase 1: How to Create Your CSR on Windows Computer
- In the Windows start menu, type mmc and run as Administrator to open it
 .
. 
- Click File, and click Add/Remove Snap-in
- Select and click Certificates, Add, and click Computer Account, Local Computer and click Finish. Click Ok

- Expand Certificates, Expand Personal, and select Certificates. Right click and select all tasks, Advanced Operations, create custom request.

- Click Next to Begin CSR, Under Certificate enrollment Policy, click Next. Under Custom Request leave the default options. i.e (No Template) CNG Key, PKCS #10 and click Next.
- Under Certificate Information, drop down icon near “Details” and Click Properties.

- Under General, Provide a friendly name.

- Click Subject: Under Subject Name, the following Options are to be selected.
- Common Name: eg: *.test.com (if wildcard) or test.com or www.test.com
- Country: eg: GH
- Locality: eg: Accra
- Organization: eg: Finance
- Organization Unit: eg: IT
- State: eg: Accra
- Under Alternative Name
- Select DNS and provide name such as: *.test.com, www.test.com, test.com
- Click Apply

- Under Extensions, Select Client and Server Authentication and Add to the selected options

- Under Private Key, Expand Key Options, Select key size 2048, and make private key exportable. click Apply and Ok.

- Click Next, Browse to a location and save the CSR with your preferred name and leave any other option at default. and Click Finish.

Phase 2: Use the Generated CSR to purchase your SSL from your preferred SSL Provider. After completion, the SSL will be sent to your email. After receiving the SSL, proceed to Phase 3.
Phase 3: How to Install the SSL on the PC/Server you generated your CSR from.
- The SSL must be installed on the PC you generated the CSR from. Because that PC/Server has the private key 🗝
- Double click the .cer you have received from your SSL provider. Select store location as Local machine.

- Select Certificate path and choose personal, certificate to install the Certificate.
- When completed, open mmc as shown in Phase 1, go to Certificates, Personal and Certificates to locate the Certificate you have just installed.

- Now if this is the same server you have your web applications on, open IIS, go to certificates and apply the certificates to your web applications.
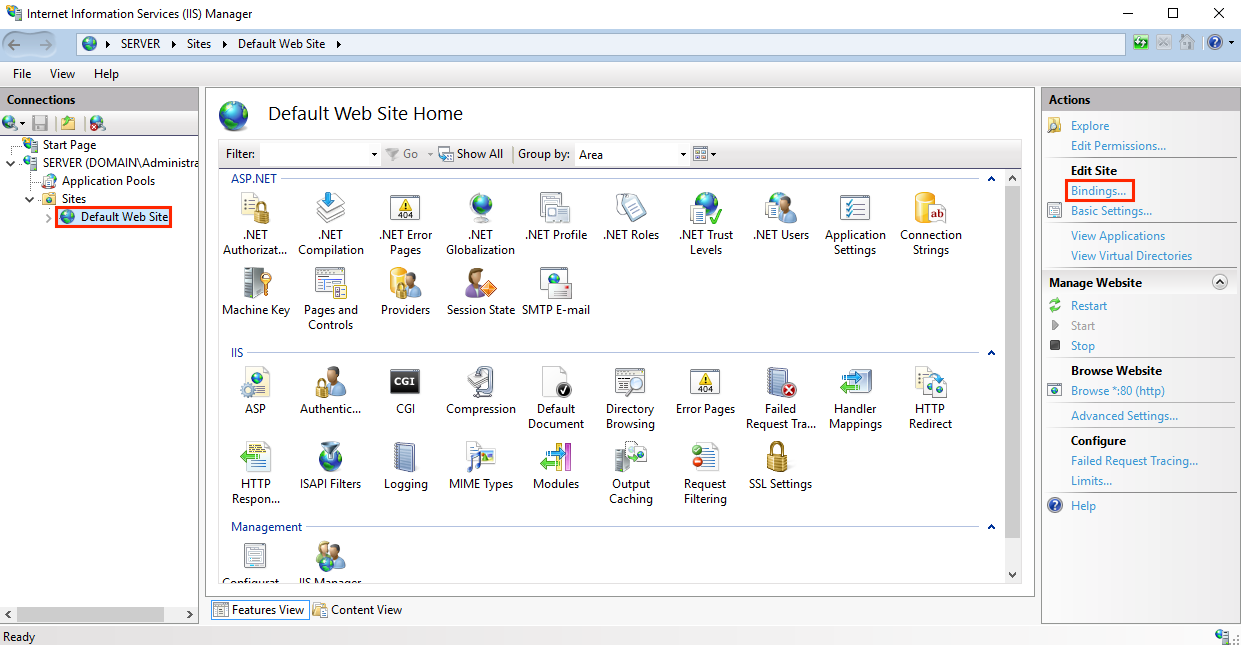
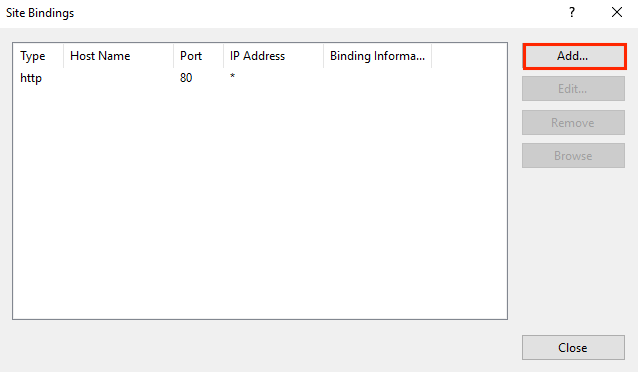
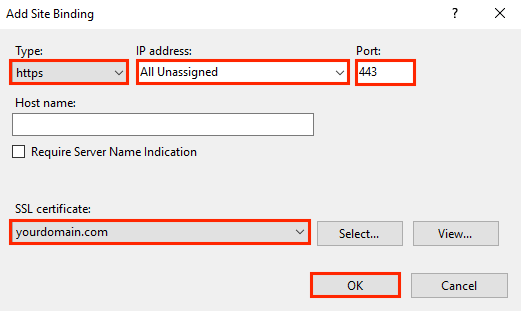
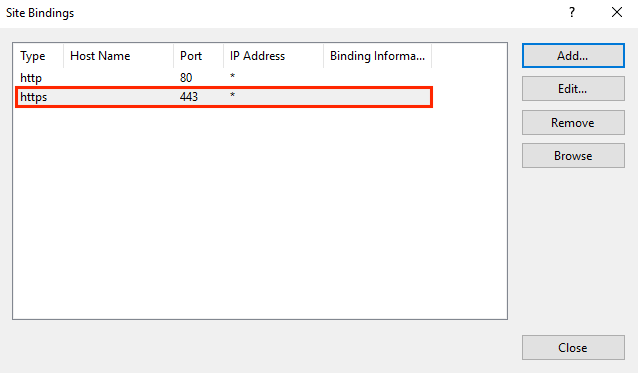
- The above steps allows you to apply the certificate to your applications.
Phase 4: How to Install the SSL on other Windows Servers or Linux Servers.
- Export the certificate from the Computer you generated the CSR and just installed the SSL on
- Select the Certificate, right click, Select All Tasks, and choose export certificate. Click Next. Ensure to select Yes Export the Private key. This will allow other servers to be able to use the SSL.


- Leave all settings at default. and click Next. Ensure You are exporting as .PFX. Because you are exporting with Private Key, you need to enter password to protect the Private Key.

- The exported PFX with the private key can be installed on any Windows Server and can be applied to any application as already shown above.
Phase 5: How to Install the SSL on Linux Servers.
- You will need the exported PFX and you password.
- visit https://www.sslshopper.com/ssl-converter.html to convert the PFX to a standard PEM.


- Browse and upload the PFX certificate, enter the password and click to convert Certificate.
- A pem will be generated for you. Open the pem with notepad. The part that starts with —Begin Private Key— is the most needed part here. You will need the private key and the .cer your SSL provider sent to you to install SSL on your Linux web servers.

- Open the .CER i.e the certificate received from your SSL provider with notepad.
- These are two files needed to install the Certificate on Linux. Go to the Linux Web Application, go to SSL, under private key, Copy and paste option 4, and under Certificate copy and paste option 5.
- The SSL will be applied successfully on your Linux Web Application. Note: Linux use the same approach discussed above however, the procedures differ from one cpanel to other.


